
In honor of Independence Day next week, today I'm going to show you an easy tutorial on how to make a button star. (I'm using the star shape and red, white, and blue buttons for the Fourth of July, but you could easily adapt this to any shape and colors.)
The first thing you want to do is sketch or print out your shape. I used an 8x8 canvas and created a star that was slightly smaller using the Shapes Tool in Word.

The majority of this project is very kid-friendly, except for this next step. You need to cut out your shape. I used a ruler and x-acto knife, but you could also use fine-tip scissors.

You now are left with a star stencil. The star shape can be used for another project; you will only need the negative space that's remaining when the shape is removed from the sheet. Place the shape where you want you star to be on the canvas. I ended up cutting a few inches from the bottom of my 8.5x11 sheet to allow it to lay flat on the canvas. You may also want to tape the paper down to keep it from shifting.

Finally, the fun part! Add buttons to fill in the star-shaped hole. We used red, white, and blue for Independence Day and for my son's bedroom (where it will live most of the year).
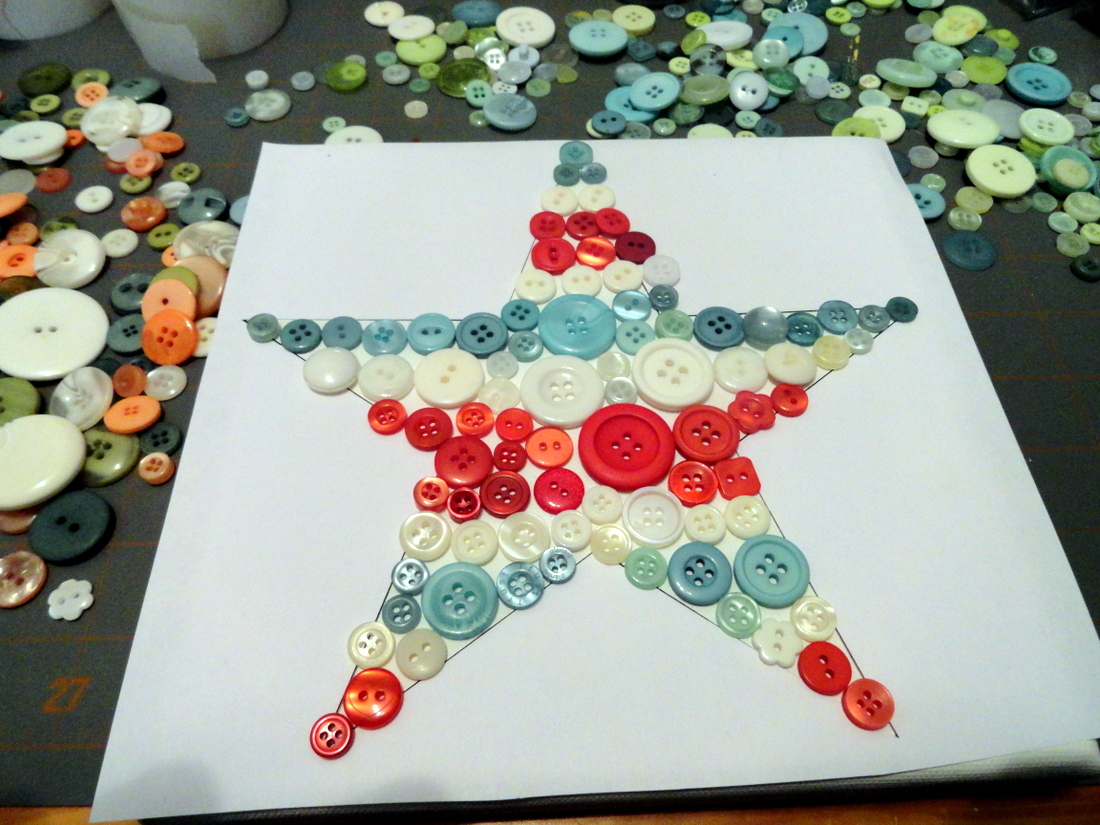
For the next step, you want to make sure you have lots of adhesive! I used several sizes of glue dots and my boys and I started adhering buttons. We roughly went row by row, and cut away the template as we moved down the star.

When I'm working with my boys, I'm not super fussy about everything being perfect, so the star shape ended up being slightly modified from the original template. I'm ok with that, but if you're more of a perfectionist than me, you may want to do the outline and let your children fill in the middle.
When we were done, we used some Glossy Accents to adhere a line of baker's twine around the perimeter of the star.

And it's done!


We're in the process of redecorating my son's bedroom...there's a definite theme happening. :)
I think this process would be equally adorable with a heart, or a flower, or the same star shape but in Christmas colors. You could make a pumpkin in the fall, or an Easter egg with pastel colors...the possibilities are endless!
Have a great weekend!

Oh my goodness this is cute!!! Thanks for the great step-by-step instructions, Dawn!!
ReplyDeleteHa! Thanks, Dawn :)
ReplyDeleteAnd if that isn't one of the cutest projects.
Makes me want to break out the buttons :)